![]()
![]()
![]()
![]()
![]()

|
|
|
TrackPlanning.com NY Signal drawn
|
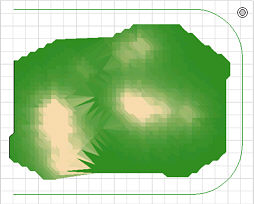
To edit a Terrain Mesh, point to its border in the 2D view and double-click the left mouse button. Remember, you should have at least one light in the drawing. 3rd PlanIt will swap to 3D mode and present you with the terrain and an editing marker. To move the marker, press the left mouse button and move the mouse. You don't need to point to the editing marker - it will move regardless of where you point in the 3D image. To change the terrain, hold the Shift or Ctrl key, press the left mouse button, and move the mouse up and down. More details of Terrain Mesh Editing are presented (soon to be available).
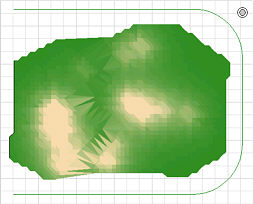
Press Tab to swap back to 2D, ending the Terrain Editing session. You can see that the Terrain Sheet that forms the seam between the two meshes has changed color. Its elevation has automatically been updated to remain in sync with the Terrain Mesh. This is "Dynamic Terrain" (tm), a powerful new way to let you create modular terrain.
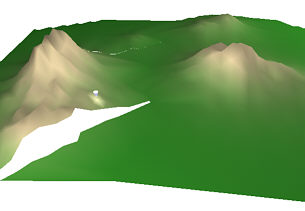
Press Tab to return to 3D (without the Terrain Editor). See how the terrain has automatically been aligned precisely for you?
Swap back to 2D using Tab and double-click the right Terrain Mesh to edit in in the Terrain Editor. Here you can see it is modified to flow reasonably with the terrain on its left.
Press Tab to return to 2D. You can see the seam terrain has again been updated to reflect the changes in the right Terrain Mesh.
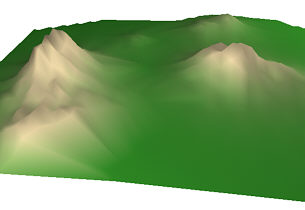
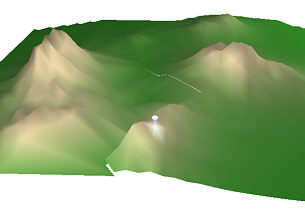
Returning once again to 3D, the terrain seam is invisible and the hills flow smoothly from side to side.
|
|
Send mail to webmaster@TrackPlanning.com with
questions or comments about this web site.
|